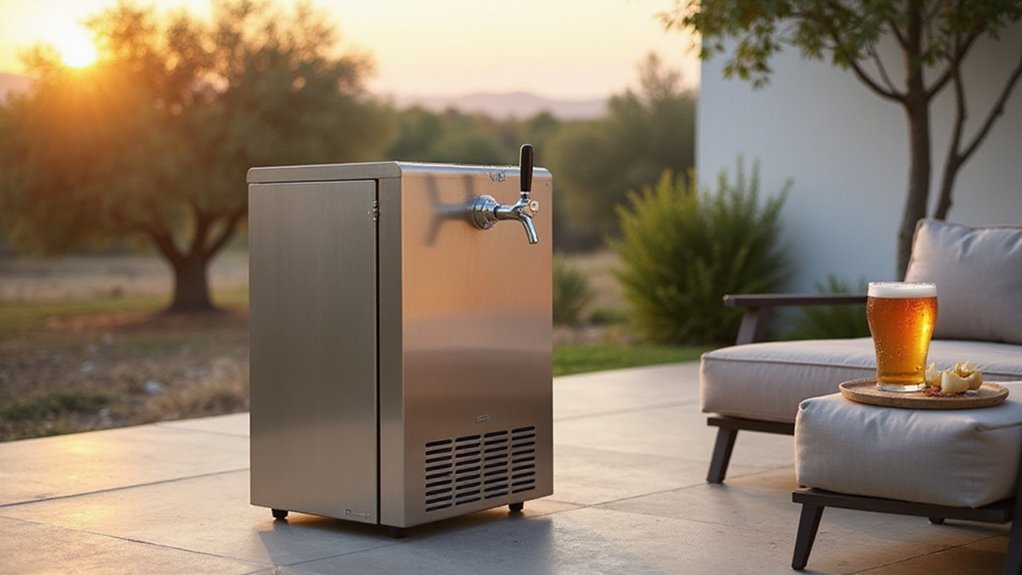
Ever wondered how to get cold, fresh beer right at home without constantly going to a bar? A kegerator is a specialized fridge that turns a standard keg into a personal draft system.
It keeps your beer at the perfect temperature and pressure for a smooth pour.
Below, you’ll find everything you need to know to set up and enjoy your own.
What Exactly Is a Kegerator and How Does It Work?
A kegerator is a specialized refrigerator designed to store and dispense a keg of beer, wine, cider, or cold brew. It works by using compressed carbon dioxide or nitrogen to pressurize the keg, which pushes the liquid through a beer line to your faucet. When you pull the tap handle, you get a consistent, draft-style pour. Similar principles apply when selecting quality butcher paper for smoking brisket, as it must withstand high heat and maintain moisture without tearing. When choosing a kegerator, consider the countertop ice makers that are reviewed for their compact design and consistent output. Maintaining the system at around 38°F is crucial for preserving flavor and freshness. Regular cleaning of the lines and coupler prevents off-flavors and keeps the system sanitary. Adjusting the gas pressure allows you to fine-tune carbonation levels, ensuring the right amount of head and fizz without wasting product.
The 4 Core Components of Every Kegerator
The four core components of every kegerator are essential for delivering a perfect pour and ensuring optimal operation. The first is the refrigerated cabinet, which maintains a temperature between 33°F and 40°F. This temperature range keeps the beer cold, fresh, and carbonated without compromising flavor. Commercial models often include thick insulation and powerful compressors to maintain stable temperatures even in busy settings. This precision mirrors the temperature control found in top-rated grills that rely on consistent heat retention for even cooking. For a similar approach to heat management, consider how a brick oven uses dense materials to evenly distribute and retain warmth for perfect pizza baking.
Next is the CO2 tank and regulator. The CO2 provides the pressure needed to push beer from the keg through the lines and to the faucet. The regulator allows you to fine-tune the amount of carbonation and control the flow rate, which affects the quality of the pour and prevents foaming.
The third component is the keg coupler, which connects the keg to the gas and beer lines. It’s crucial to use the correct coupler type for your specific keg brand because incompatible couplers can prevent proper dispensing or damage the system.
Finally, the beer line transports the beer from the coupler up through the draft tower to the faucet. The line’s length and diameter significantly influence the pour quality, especially foam levels. Regular maintenance, including replacing worn couplers, lines, or seals, is vital to prevent leaks and ensure consistent performance over time.
How to Set Up Your First Kegerator
Start by choosing a spot with a level floor and enough space for the compressor to breathe. Install the casters and ensure the unit is perfectly level using a spirit level or level app. Thread the beer line through the tower opening, then mount the tower and attach the faucet securely. Connect the CO2 regulator to the tank, then attach the gas line to both the regulator and the keg coupler. Lock the coupler onto your keg tightly to prevent leaks. Open the CO2 valve and set your regulator to 10–15 PSI, which is ideal for most beers. Set the refrigerator temperature to 36–40°F for proper serving. Before first use, conduct a leak test by applying soapy water to all connections; bubbles indicate leaks that need fixing. For remote installations, route the gas lines through cabinet openings to keep everything neat and functional. Use UVA barrier type tubing for durability and oxidation protection when cutting the beer line into proper lengths. Finally, review your maintenance checklist to clean the lines and faucet regularly, ensuring perfect pours every time. You’re now ready to enjoy fresh beer straight from your kegerator. Keep in mind that total beer capacity varies by model, from half-barrel kegs holding about 15.5 gallons to smaller sixth-barrels, so check your unit’s specifications to know how many beers you can serve before tapping a new keg. For optimal equipment placement, the area around the kegerator should maintain good insulation to prevent unnecessary compressor cycling. Just as you should protect electrical connections from moisture outdoors, keep the kegerator’s power cord and regulator dry to ensure safe operation.
What Beverages Can Your Kegerator Dispense?
Your kegerator can dispense a wide variety of beverages beyond just beer. You can serve craft beer options like IPAs, stouts, or lagers, keeping them fresh and on tap. It’s also suitable for fizzy drinks like hard cider, kombucha, and sparkling water, especially when you lower the CO₂ pressure to prevent over-carbonation.
Non-alcoholic options work just as well. You can tap carbonated beverages such as soda, root beer, or flavored sparkling water for family gatherings. Cold brew coffee and nitro cold brew are also compatible, although nitro cold brew requires a nitrogen tank to achieve that signature creamy texture. Pre-mixed cocktails like margaritas or sangria can be poured quickly and consistently from a keg. When you switch to a nitrogen-based gas system, your kegerator can even dispense wine, mead, or still wine varieties. Additionally, it handles beverages like lemonade, iced tea, or flavored waters, making your setup versatile for any occasion. Unlike porous outdoor materials, the kegs and components in your kegerator are non-absorbent like glass and stainless steel, ensuring no moisture is trapped to affect beverage quality. For those building their own setup, incorporating durable design choices from outdoor furniture builds can help protect the kegerator’s components from the elements.
Which Kegerator Size and Tap Count Is Right for You?
Choosing the right kegerator size and tap count depends on your available space, serving needs, and keg preferences. Measure your area carefully because kegerator dimensions vary widely. Mini units are ideal for small spaces but only hold a 5-liter keg. Compact models can handle Cornelius or sixth-barrel kegs, making them suitable for limited spaces with moderate capacity. Full-size units accommodate a half-barrel keg and are best for high-volume dispensing. For natural gas fire pits, outdoor propane options often require similar space planning to ensure safe placement and adequate ventilation. For the best results, consider models that combine gas grill and smoker functionality if you also enjoy outdoor cooking versatility.
For tap configurations, a single-tap model is the most space-efficient and suits casual or occasional use. A dual-tap setup allows you to serve two beers simultaneously without a significant size increase, perfect for small gatherings. Triple-tap models require more width due to additional hardware but are better for frequent entertaining or serving multiple styles at once.
Match the keg format to your volume needs. If you only plan to serve occasionally, a single-tap unit with a smaller keg is sufficient. For moderate to heavy use, dual or triple taps offer more versatility and capacity. Always consider interior layout, as more taps mean extra space for lines and hardware, which can affect the overall size of your kegerator. When planning your setup, also factor in the total weight of a fully loaded unit, as this influences floor support and placement logistics.
Kegerator vs. Keezer: Which Appliance Should You Convert?
A keezer begins with a chest freezer, offering a wider interior space that’s horizontal in orientation. This design provides more energy efficiency because the heavy lid traps cold air better, which can lower your electricity bills. However, you’ll need to add a temperature controller to prevent the freezer from freezing your beer, as the freezer’s temperature range is not always suitable for long-term storage of frosty beverages. Loading kegs into a keezer can be more challenging since you have to lift them over the top opening. This can require some physical effort and may necessitate practice or special equipment like a keg lift. Unlike a gas grill’s infrared burner which radiates heat directly onto food for even cooking, a keezer requires careful temperature management to avoid freezing. If convenience and space-saving are your priorities, a standard kegerator might be better, as it typically offers easier access with the door at the front. But if you want greater capacity and lower operational costs, a keezer provides more room for multiple kegs and longer-term savings, at the expense of extra setup work. A side-opening keezer design allows access through a 15 cm gap, reducing the need to lift heavy kegs overhead. For those who also grill, using a refillable propane tank can ensure you never run out of fuel during a cookout. Just as grill grates require seasoning to prevent rust, a keezer’s interior must be properly maintained to avoid corrosion from moisture.
Common Kegerator Problems and How to Fix Them
If your kegerator isn’t cooling enough, the problem often lies with dirty condenser coils or a malfunctioning fan motor. Dirty coils prevent heat from dissipating efficiently, so regularly clean them to improve cooling performance. Also, check the fan to ensure it’s functioning properly; a broken or blocked fan will block heat release, reducing cooling. For best results, avoid the common beginner mistake of placing the kegerator too close to a wall, which restricts airflow around the coils. Performing these simple maintenance steps can restore proper temperature control and keep your beer perfectly chilled. For the best-tasting pour, you should also regularly clean the kegerator tap to remove baked-on grease and residue. If you are hosting outdoors, consider using a top outdoor patio cover to protect your equipment from direct sunlight and heat.
Why a Kegerator Saves Money and Keeps Beer Fresher
A kegerator can save you a substantial amount of money and keep your beer fresher longer. Drinking two six-packs weekly typically costs around $13 from a store, whereas a keg costs about $7–8 per six-pack equivalent. Over the course of a year, this adds up to roughly $240–$288 in savings. The key factors are buying beer in bulk from a keg and reducing packaging waste—one keg replaces approximately 165 disposable bottles or cans. Additionally, kegs are reusable, which means fewer restocking trips and lower transportation costs. This system also reduces waste by eliminating single-use packaging, as kegs and gas tanks are reusable. The proper preheating time for a pizza stone helps ensure even heat distribution for a crisp crust.
Fresher beer is another major benefit. A kegerator keeps beer sealed, cold, and carbonated, preventing it from going flat or developing off-flavors like skunky aromas found in opened cans. This preservation method allows your beer to stay fresh for weeks rather than just days. By reducing stale beer waste and maintaining optimal freshness, each keg provides more value with lower cost per ounce. Ultimately, the combination of lower expenses and improved freshness makes a kegerator a smart investment that can pay for itself in less than a year.