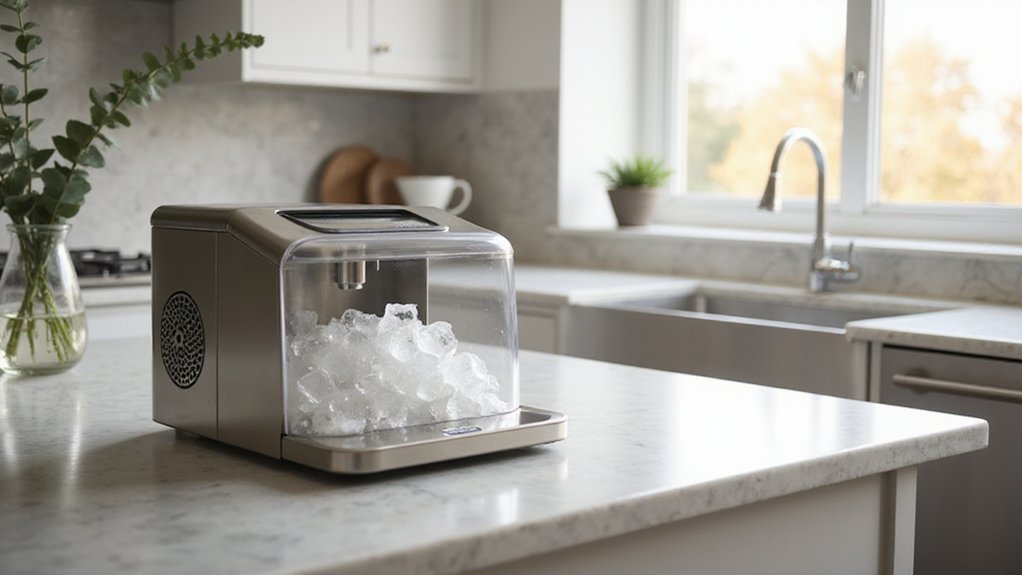
If you’re wondering how to keep your nugget ice maker clean and ensure the ice tastes fresh, you’re in the right place. Regular cleaning not only maintains good flavor but also extends the machine’s lifespan.
With the simple steps here, you can easily keep your appliance in top shape and enjoy pure, crisp ice every time.
Why A Dirty Nugget Ice Maker Ruins Flavor And Ice Quality
A dirty nugget ice maker can turn your clear, refreshing cubes into a health hazard and flavor disaster. Bacteria, mold, and biofilm readily develop inside a contaminated machine, contaminating every piece of ice produced. These microorganisms release odors and produce residues that absorb into the ice, transferring musty, sour, or metallic flavors to your drinks. You’ll notice the off-taste before you see any visible signs of mold or residue, which makes tasting your ice a quick test for cleanliness. For help finding a model that is easier to maintain, check out reviews of the top countertop ice makers currently available. Unlike a pellet smoker that uses a controlled burn to flavor food, an ice maker relies on a clean water system free of mold to produce quality ice. Using safe cleaning products designed for your machine helps prevent these flavor issues.
The quality of your ice also declines noticeably with dirt buildup. Mineral scale and biofilm interfere with the freezing process, causing your once-clear nuggets to become cloudy and soft. This not only hurts the visual appeal but also signals that impurities are present, which can ruin drink presentation. Inside the dark, moist environment of a neglected ice maker, bacteria like E. coli and Listeria can thrive, increasing your risk of foodborne illness. If your ice develops an off-flavor or foggy appearance, it’s a clear sign you need to clean the machine immediately. Ignoring these issues guarantees poor ice taste, unattractive looks, and potential health risks.
Supplies For A Safer Clean (No Harsh Soap Needed)
Start by gathering gentle, food-safe supplies that won’t harm your ice machine or leave unwanted residues. Use microfiber cloths, soft sponges, and a soft-bristled brush or old toothbrush for cleaning crevices. Begin with warm water to loosen grime, then apply white vinegar or a commercial ice machine cleaner to address mineral buildup. Avoid harsh soaps, as they can leave residues that affect taste. For sanitizing, opt for a food-safe sanitizer or a diluted bleach solution, ensuring you rinse thoroughly afterward to prevent any chemical lingering. Always wear gloves to protect your skin and work in a well-ventilated area. Adjust your cleaning frequency based on how often you use your machine; more frequent cleanings help reduce scale formation and bacterial growth. Your focus should be on effective, residue-free cleaning that preserves the integrity of plastic parts without causing damage.
Step 1 – Unplug, Empty The Bin, And Drain Water Lines
You should always unplug your nugget ice maker before starting any cleaning process to ensure electrical safety. Unplugging removes the risk of electrical shock and helps loosen any stuck ice in the bin. Wait about ten minutes after powering off to allow the ice to loosen before fully emptying the bin. Discard all ice into the sink, as leftover cubes can block drainage and hinder cleaning access. For this machine, the descaling process uses vinegar to clean the system and requires clearing all ice before beginning. When designing your workspace, consider building a dedicated outdoor kitchen frame for easy access to the machine and its drain. For similarly durable surfaces, you can follow the same approach as cleaning cast iron to avoid harsh chemical damage. You can connect the machine’s drain hose to a natural gas line with a proper adapter for continuous operation.
Next, remove the drain cap or plug to let water drain from the reservoir and internal lines into a bucket or sink. Allow the water to flow freely until the drain stops actively draining. Only then should you reinstall the plug to prevent residual moisture from affecting your water filtration system later. After the water has fully drained, wipe the drain area dry. Fully draining the machine prevents issues with ice thickness during the next cleaning cycle and prepares the unit for thorough cleaning.
Step 2 – Mix Vinegar Or Descaler And Run The Clean Cycle
Pour the cleaning solution into the reservoir up to the maximum fill line after draining and drying the machine. For cleaning solutions, check your manual for specific vinegar ratios, as some models require undiluted white vinegar while others need a 1:10 or 50/50 mix with water. Heat the solution to between 100 and 120°F for optimal cleaning. Note that unlike outdoor countertop units, these indoor ice makers typically lack the insulation to keep ice frozen without power. Scrubbing the ice basket with a soft cloth and mild soap also helps prevent odor buildup. For stubborn residue, using a bottle brush on the tap components can help lift baked-on grime before the clean cycle.
Activate the clean cycle by holding the clean button for about 3 seconds. Most machines perform up to three automatic cleaning cycles, which may pause mid-cycle to allow the solution to soak. For heavy scale buildup, leave the solution in the machine for 12 to 18 hours, with overnight soaking being ideal. This circulation and soak process helps break down deep internal mineral deposits that can’t be cleaned by hand, making soaking an essential step for effective descaling. Indicators like flickering S and L may signal that the clean cycle is operating, confirming the solution is circulating properly.
Step 3 – Wipe Reachable Nugget Ice Maker Surfaces
After the cleaning cycle completes and you’ve drained the machine, unplug your Reachable Nugget Ice Maker. Use a damp microfiber towel—lightly moist, not soaked—to wipe down all accessible surfaces inside and outside. Focus on the interior walls around the bin, reservoir, and ice chute to remove loosened film and residue, which helps maintain effective surface polishing. Be sure to dry the drip tray completely to prevent mineral buildup. On the exterior, wipe the front panel and lid, paying special attention to vents and openings to eliminate dust. For thorough hygiene, use a clean, damp microfiber towel to remove residues or deposits after each cleaning session. When cleaning the stainless steel surfaces, wipe along the grain with a soft, damp cloth to avoid scratches. Finish with a dry towel to prevent water spots and surface buildup. Avoid using abrasive pads or harsh cleaners, as these can damage plastic and stainless finishes. For particularly stubborn grime, a baking soda paste offers a gentle abrasive alternative that lifts baked-on residue without scratching. For a more eco-friendly approach to surface maintenance, consider using butcher paper alternatives as a protective liner during cleaning. To ensure optimal airflow and prevent overheating, regularly check that the condenser fins remain free of dust and debris, much like maintaining proper airflow around a pellet smoker’s heat diffuser.
Step 4 – Rinse Twice To Remove Every Residue Trace
Rinsing twice is necessary to effectively remove every residual trace of cleaning solution. Use only fresh water for each rinse cycle—never reuse the old water. Drain the reservoir completely after each rinse, then refill it with clean water. Run two to three full rinse cycles to ensure all hidden channels are cleared of chemical residue. This step is especially important with commercial equipment, where heavy-duty cleaning chemicals can linger in deeper tubing. Always run water through assembled parts of the unit to prepare for reassembly and flush out any cleaner residue from hoses and connectors. For the best approach, treat these tasks like prepping surfaces on butcher paper to avoid any cross-contamination. Similar to optimizing CO2 tank life, maintaining thorough rinse cycles prevents buildup that disrupts performance. To ensure accuracy during post-cleaning checks, always allow the unit to reach ambient temperature before testing any internal sensors. Continue rinsing until the water runs clear and there is no cleaner scent detected. If you observe any odor or foam, run an additional rinse cycle. Ensure the machine is fully drained between cycles to prevent leftover residues in low spots. Completing this process thoroughly helps guarantee zero chemical traces in your ice-making unit before it resumes producing ice.
Step 5 – Toss The First Batch Of Ice After Cleaning A Nugget Ice Maker
Toss the first batch of ice after cleaning to ensure it is free from any residual cleaning agents or loosened deposits. This initial batch acts as a final flush, removing leftover cleaner, descaler, and debris from the internal water lines and freezing surfaces. Discard this batch immediately, as it may have an off taste or a chemical odor. Using a safe cleaning product prevents strong chemical aftertastes in the final ice output. Unlike natural gas or propane fire pits, which require different fuel and maintenance considerations, your ice maker’s final flush simply focuses on removing cleaning residues. If the ice still smells like vinegar or cleaner after the first batch, run another cycle and discard that batch too. Check for a clear, neutral taste, a transparent appearance, and no floating particles. Usually, two or three batches suffice, depending on the cleaning product’s strength. Once the ice tastes neutral and looks pure, your nugget ice maker is ready for regular use. Plan this step when you don’t need ice immediately, because usable ice won’t be available until the flush-out is complete. Properly discarding early batches is essential for maintaining the quality and flavor of your ice. Understanding this flushing process is similar to knowing how heat and flavor differ when choosing cooking materials, as both affect the final result.
Schedule Cleaning Based On Your Water Hardness
After flushing away the initial batches of ice, you should set a cleaning schedule based on your water hardness. Check your local water report: 0–4 grains per gallon (gpg) means descaling every 2–4 months, while 4–7 gpg requires cleaning every 1–2 months. When water hardness reaches 7–10 gpg, clean every 3–4 weeks, and if it exceeds 10 gpg, aim for every 2–3 weeks. Butcher paper and parchment differ in performance, cost, and durability; for example, butcher paper is better suited for wrapping meats for smoking, while parchment handles high-heat baking without burning.
Hard water contains more minerals that accelerate scale buildup. If you use unfiltered tap water or well water, opt for shorter intervals—daily usage also pushes you toward more frequent cleaning. While sanitizing weekly is recommended regardless, descale more often if your water is harder. Switching to distilled water can extend the time between cleanings. Remember, the harder your water, the faster scale forms, so don’t wait for visible buildup before cleaning.
Avoid These Four Mistakes That Leave Residue Or Dent Fins
To prevent residue buildup or dented fins, avoid these four common mistakes. First, always complete a second water-only rinse after descaling. Leaving vinegar or cleaner residue can coat internal surfaces, degrading taste and leaving a film. Run the rinse until no cleaner smell remains, which typically takes a few cycles. Second, be cautious with chemicals. Using harsh cleaning solutions or abrasive pads can corrode parts and leave unsafe residues. Instead, opt for mild detergent and a soft cloth, then rinse thoroughly to prevent damage. Third, avoid aggressive vacuuming of the condenser fins. Pressing too hard can bend or break the fins, which reduces airflow and hampers performance. Use gentle suction and a soft brush for cleaning. Lastly, do not overfill the water reservoir or spray water directly into sensitive areas with high pressure. Excess moisture can seep into parts, causing hidden residue or mechanical issues. Use controlled amounts of water and ensure the unit drains properly after cleaning. For heavy-duty buildup, consider using a gas grill and smoker combo to quickly burn off residue at high temperatures.
Prevent Odors And Slime Between Deep Cleans
To prevent odors and slime between deep cleans, focus on thorough drying, good airflow, and quick maintenance. Start by leaving the lid open after emptying the reservoir to allow interior surfaces to fully dry. Wipe down the reservoir and lid weekly with a damp cloth to prevent slimy film buildup. For odor control, use filtered or distilled water to decrease mineral deposits that contribute to smells. If you won’t be using the machine for more than a day, empty the reservoir and keep the unit unplugged and uncovered during drying. Pay special attention to splash-prone areas like the bin lip during quick wipe-downs. Combining these steps with a deep clean every 1 to 2 weeks, especially with frequent use, helps keep your ice fresh and odor-free.