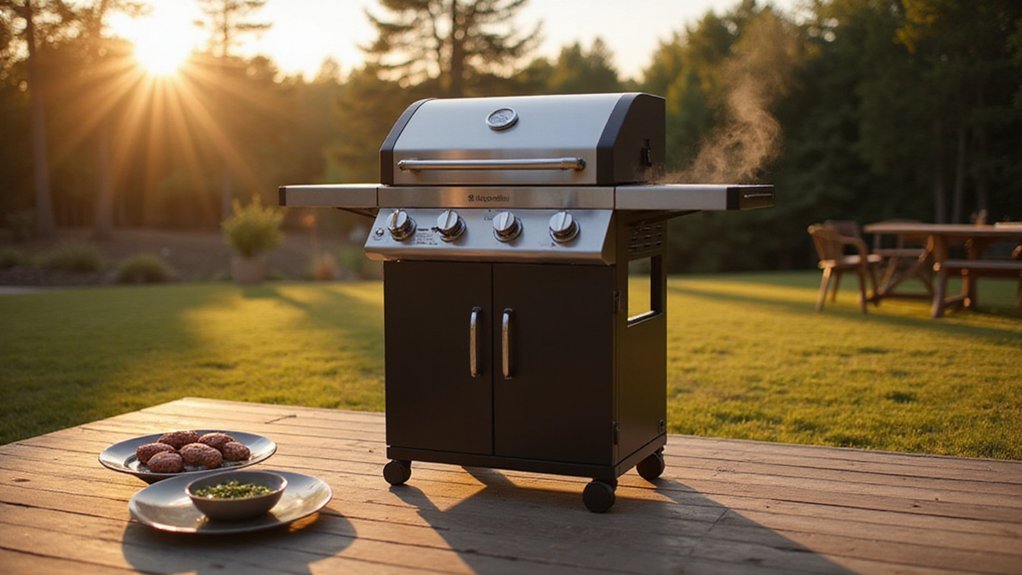
Switching your propane grill to natural gas might seem tricky, but it’s manageable with the right steps. The key is ensuring your grill is compatible and following a precise process to keep everything safe and working well.
By the end, you’ll know how to safely convert your grill, from swapping out parts to fine-tuning for perfect flames.
Keep reading to get the full step-by-step guide that makes it straightforward and reliable.
Can You Convert Any Propane Grill to Natural Gas?
You cannot convert a propane grill to natural gas unless the manufacturer explicitly approves it. Check your owner’s manual or rating label for a dual-fuel designation first. If your grill isn’t rated for natural gas, conversion isn’t possible. Using a universal conversion kit designed for multiple models is risky and not recommended. These kits are often incompatible with your specific grill’s valve design and BTU output, which can lead to weak flames or dangerous leaks. Attempting to retrofit without official support voids warranties and compromises safety. If no manufacturer-approved conversion kit exists for your model, it’s safest to treat your grill as non-convertible. Improvising with non-approved parts is dangerous and can significantly reduce fuel efficiency. Professional consultation is recommended when uncertain, as improper conversions can cause safety hazards and damage equipment integrity. A proper conversion also requires a dedicated natural gas supply line with a regulator set to the lower pressure your grill needs, which is a key step outlined in most official guides.
What You’ll Need in a Conversion Kit for Natural Gas
To convert your propane grill to natural gas, you’ll need a specific conversion kit that replaces fuel-specific components such as the regulator, hose, and orifices. The regulator steps down your home line pressure to match the grill’s low-pressure requirements. The hose, typically around 10 feet long, connects through a quick-release fitting to your house outlet. Orifices are essential; they are matched to your burner layout—whether for main, side, or rotisserie burners—and control the amount of gas flowing into each burner. Top gas grill and smoker combos often require careful attention to component compatibility during conversion.
Never assume a universal kit will suffice. Fuel compatibility is critical, so choose a kit designed for your grill’s model. Always verify the part number of your grill before making a purchase. Also, check that your outdoor gas valve and fitting match the kit’s connection style to ensure safety and proper operation. Common tools needed include a Phillips screwdriver, an adjustable wrench, and a 6 mm tool for small fittings. Some kits may omit orifices, so confirm you have the correct ones before starting the conversion process.
Step 1: Turn Off the Propane and Disconnect the Tank
You should always start by turning off the propane tank before disconnecting it. This ensures a controlled shutdown of the gas supply. Begin by turning all burner control knobs, including side burners, to the off position. This stops gas flow to the burners and reduces the risk of residual ignition.
Next, close the propane tank valve by turning it clockwise until it is fully shut. This halts additional gas from entering the regulator and hose, creating a safer environment. Allow the remaining line pressure to bleed off; you might hear a brief hiss or pop, which is normal. Keep all ignition sources away during this depressurization to prevent accidental sparks. This process matches the safety checks before first use outlined in guides to ensure no residual gas remains. Performing these steps is similar to the DIY steps for a routine propane tank change, which also emphasize safety and depressurization. Unlike a grill conversion, a pizza stone requires gradual heating to prevent cracking during high-temperature cooking.
Only after confirming the valve is fully closed and the line pressure has been released should you disconnect the hose. Keep the tank upright and move it away from the grill. Verify that all knobs are off, the valve is closed, and check for any lingering gas odor. Following this sequence helps ensure safety during disconnection and preserves your equipment.
Step 2: Remove Grates, Burners, and Carryover Tubes
To remove the grates, burners, and carryover tubes, start by detaching the burners from the firebox. Locate the burner retaining clips or hitch pins, which are usually positioned at the back. Carefully remove these clips or pins to free the burners.
Lift the back of each burner slightly while sliding it out to disengage it from the valves. Remove one burner at a time to maintain proper alignment and avoid confusion. Once the burners are free, locate the carryover tubes and their retaining clips. Lift the tubes out carefully, ensuring you do not bend or damage them. Unlike pellet smokers, using wood chips directly in a propane grill is not recommended due to fire hazards. Before starting, ensure you have a natural gas conversion kit that includes a hose and larger natural gas orifices to replace the original burner nozzles.
If a burner is equipped with an electrode, gently pry it off using a flat screwdriver. Take care not to bend the electrode tip, as it is crucial for ignition purposes later on. Save all parts you remove for reassembly or cleaning purposes.
Step 3: Swap Propane Orifices for Larger Natural Gas Orifices
To ensure proper combustion, you need to swap the propane orifices for larger natural gas ones. The new orifice diameter should be about 1.5 to 1.7 times greater than the propane orifice. Propane’s higher pressure pushes fuel through smaller holes, while natural gas requires a larger opening at lower pressure to deliver the same BTUs. Locate the existing orifice at the end of the valve, often stamped with its size. Use calipers to measure it precisely or refer to your burner’s BTU rating for the correct size. Failing to use the appropriate orifice size can restrict gas flow, resulting in weak flames, uneven combustion, and poor heat output. Replace each orifice with the correctly sized natural gas jets to maintain proper fuel pressure and air mixture, ensuring clean, consistent burner performance. This kit’s orifices are made of solid brass for corrosion resistance and durability.
Step 4: Replace Control Bezels and Adjust Air Flow
To replace the control bezels and adjust airflow, start by removing the control knobs. Pull off the knobs carefully, then unscrew the two screws holding each bezel in place. Lift off the old propane bezels and install the natural gas ones, making sure the knob markings align correctly and the knobs turn smoothly. Proper alignment prevents issues with low-flame control. Consult the grill’s rating label for the correct conversion kit to ensure bezel compatibility. If the replacement bezels do not fit properly, check for a leak detection seal around the valve stem to ensure a safe connection. For additional guidance on selecting the right kit, the page comparing top BBQ gas grills for every budget can help identify compatible components. Using an infrared thermometer can help verify that burner tube temperatures are evenly distributed during testing.
Next, focus on airflow adjustment at the burner tubes. Center each burner tube over its valve and verify that the venturi is correctly aligned. After reinstalling the bezels, check that the knobs rotate freely without binding or resistance. Confirm the correct air and gas mix by observing a steady blue flame during operation. Only tighten the screws after ensuring the components are properly aligned. Keep the old LP bezels for future reconversion, and make sure all burners are off during this adjustment step.
Step 5: Swap the LP Regulator for Your Natural Gas Hose
To swap the LP regulator for your natural gas hose, start by removing the existing regulator. Then, install your natural gas hose assembly, routing it through the rear panel toward the manifold connection. Ensure the hose avoids pinch points that could restrict flow or cause damage. Tighten the connection securely with a wrench, making sure there are no leaks.
It is crucial to remember that LP and natural gas systems operate at different pressures. Do not reuse the LP regulator as-is. Your conversion kit should include the appropriate natural gas regulator or interchangeable parts designed for this purpose. The kit is designed for propane-to-natural gas transition and supports 95,000 BTU to 16,000 BTU natural gas. Follow the manufacturer’s instructions precisely, as different kits may vary in their assembly procedures. Before completing the installation, secure any side-panel mounting with the provided screws.
Leak Test Every Natural Gas Connection Before Lighting
Before lighting the grill, you must leak-test every natural gas connection you’ve just installed. This step is essential for safety and is non-negotiable. Keep all knobs turned OFF and open the lid. Remember, indoor safety requires avoiding any ignition sources, and proper ventilation means ensuring good airflow and clear lighting. Conduct this leak check each time before grilling to confirm the system remains secure. For added assurance, consider reviewing product reviews for similar quality and value comparisons when selecting gas components. Unlike electric or pellet smokers, natural gas grills require a leak test before each use to ensure no gas escapes at the connections. When replacing any part, be sure to find top gas grill parts that match your specific model for a secure fit.
Mix a 50/50 solution of dish soap and water, then spray or brush it over the hose, regulator, valves, and all joints. Slowly open the main gas valve to pressurize the system. Watch for the formation of bubbles—these indicate a leak. If bubbles appear, shut off the gas immediately, tighten the fitting, and re-test. If bubbles persist, replace the faulty component.
Do not proceed to lighting until no bubbles are visible anywhere in the system. Turn the gas off, wipe away soap residue, and wait about five minutes for any remaining gas to dissipate. Once the area is dry, tight, and bubble-free, you can safely light the grill.
Tune the Burners for a Clean Natural Gas Flame
To ensure your grill produces a clean, efficient natural gas flame, start by cleaning the burner surfaces with a wire brush to remove rust or debris that can disturb the flame shape. Dirty ports may cause uneven or small flames, compromising heat and safety. Light the burner and adjust the air shutter incrementally, making small adjustments each time. Aim for a bright blue flame with minimal orange tips; orange indicates insufficient air. If the flame is yellow, increase the air until it turns blue. Too much air creates a harsh, unstable flame, so avoid over-adjusting. Check the low setting, ensuring the flame stays lit during quick knob changes from high to low. Proper tuning promotes reliable ignition performance and energy efficiency. Always follow safety precautions, especially after cleaning, to prevent leaks or flame irregularities. When the flame is stable, even, and bright blue across all ports, you have achieved optimal burner performance. Using a premium baking stone can help retain consistent heat for even cooking in a converted grill. Clean crossover tubes ensure flame propagation across multiple burners for reliable ignition. Storing natural gas equipment in a dry environment helps prevent moisture damage to burner components and connections. For best results, consider the tank size and fuel type when selecting your original propane setup, as this influences conversion compatibility.
Why Does Natural Gas Need Bigger Orifices Than Propane?
Natural gas needs larger orifices than propane because of its lower energy density. To produce the same heat output, you must allow more natural gas to flow through a bigger opening. Typically, natural gas runs at about 4 inches water column pressure, while propane operates near 11 inches. This lower pressure means natural gas requires a wider orifice to supply enough fuel to the burner. If the orifice is too small, the flame will be starved, resulting in weak, unsatisfactory combustion. Using a propane-sized orifice with natural gas can disrupt the fuel-to-air ratio, causing underfiring or ignition issues. Proper orifice sizing ensures a safe, efficient burn and the correct BTU output for your appliance. This precision is critical because these grills connect to a fixed home gas line rather than a portable tank, meaning the fuel supply pressure remains consistent but lower than propane. Infrared thermometers use non-contact temperature measurement to quickly check burner performance and confirm even heat distribution. This process often involves drilling and stamping the designated size number onto the orifice to confirm correct hole diameter and ensure proper gas flow. For consistent results, selecting a countertop ice maker with similar precision ensures reliable performance in other appliances.